How to set up starlink
The satellite-based Starlink internet service unlocks excellent speeds pretty much anywhere you can see the sky. Here's what you need to know and how to get started.
一、How to Get Starlink
Starlink is now more accessible than before, with installation kits available for purchase at popular retailers such as eBuy, Amozon, Best Buy, and Walmart. The previous issues of waitlists and limited availability are no longer a concern. Whether you reside in North America or many other regions globally, Starlink is now widely accessible and prepared to offer fast service.
Currently, the cost of the installation kit is lower than ever before. Previously, the basic equipment was priced at $599, then reduced to $499, and now stands at $299, representing a significant decrease from the original price. Additionally, customers in certain regions with sufficient Starlink capacity may receive a $100 equipment discount applied as a credit towards their monthly charges.
二、How Much Does Starlink Cost?
The monthly fees are quite substantial, amounting to $120 for residential service which is pricier compared to the typical cable internet bill. Despite the cost, Starlink offers more than just internet access for that price. One notable benefit is the absence of a data cap, allowing you to utilize the high-speed satellite connection without limitations for various activities like work, school, streaming, and gaming, without having to worry about incurring extra charges.

Second, Starlink doesn't require contracts. You sign up for the service through the Starlink app, and pay from month to month. You are free to cancel or pause your subscription at any time.
Different Starlink internet plans tailored for specific situations, such as maritime applications or mobile home travel, are detailed in the provided chart. However, for the majority of users, the Starlink home plan is the ideal choice. To add variety, Starlink is considering introducing a new family plan that includes discounts for additional subscriptions (such as a Roam plan for the family's recreational vehicle), enables management through a shared family account, and simplifies billing by consolidating all services into a single payment.
三、Starlink Installation Kit Contents
Starlink Installation Kit includes all you need to start: a Starlink satellite dish with kickstand as well as a Starlink router unit base. Find out more here about the latest Starlink gear. There is also a Starlink power cord for the base and a Starlink cable of 75 feet to connect the router to dish.

Starlink cable can also be ordered in larger lengths from the Starlink Store. Starlink also offers additional accessories such as adapters and mounting hardware for connecting to other equipment using standard Ethernet. To learn more, check out our guide on Starlink accessory.
The box contains a relatively simple instruction sheet, with only illustrations. There is no text. However, you will find a barcode that links you to Starlink’s support website. After reading the instructions, you may assume that you simply need to plug in your router and power adapter before pointing the dish skyward. But it's not as simple as that. You'll need to place the dish properly, mount it on a Starlink mounting plate, and likely run a cabling through an external wall. For all of these, we've provided detailed instructions. Starlink's best installation tips are below.
四、How to Install Starlink
1. Before You Buy, Find a Mounting Location
You can check whether your location is suitable for mounting a Starlink dish before ordering the installation kit. Download the Starlink Obstruction app (free on both Android and iOS). Then scan the sky. The Starlink apps for Android, and Starlink apps for iPhone are free to download.

Starlink has an interactive tool to help you validate and find the correct position for your new dish. The guidelines are simple enough to follow. It is important to have a clear view of the sky with at least 110 degree of space around and above the dish. It is important to keep a constant connection with satellites.

Mounting ideas include an open area, a roof, or another elevated structure, such as a pole. These locations are above any obstructions like fences, trees, and buildings.
Starlink allows you to use the phone camera to scan a viewing area on the dish. To do this, you need to aim the camera towards the sky. You may have to get creative with your positioning in order to see the screen and move it. The camera should be positioned roughly in the same location as the dish.

The app’s obstruction-scanning function guides you in this process. You first point the camera to the sky, then you sweep around the outermost edges of the visible area. The app shows green dots on your screen to indicate areas that have not been scanned within the dish's view. You can also use an arrow to guide you where to scan next.
The app needs some time after scanning the sky to process the information. After a short time of crunching numbers, it will tell you whether you can receive good reception in that area.

Another consideration is snow. Starlink dishes have a Snow Melt feature which keeps the surface clear. If you are concerned that there may be too much snow piled around where you intend to install the dish you should consider this.
2. Unbox Starlink
Unpacking the Starlink install kit is pretty quick and easy, but make sure you've got everything you need:
- Starlink dish
- Starlink router
- 75-foot Starlink cable
- Power adapter
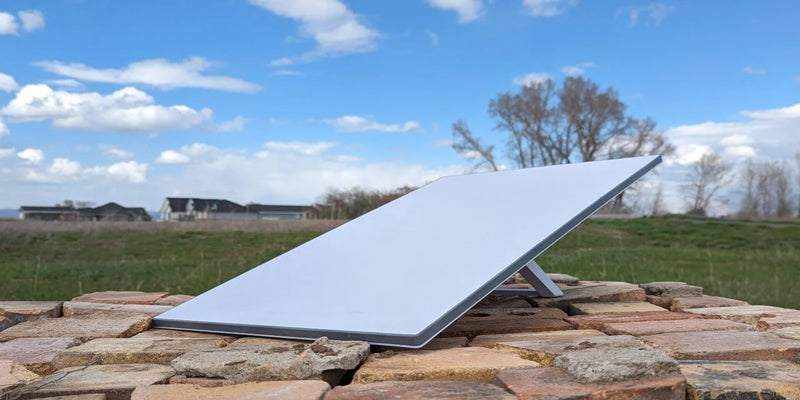
You may not need anything else if you are setting up the dish in your yard or near an RV. It's super easy to place the dish on any flat surface with a good view of the sky thanks to the integrated kickstand. The kickstand is equipped with holes for screws or stakes if you wish to install it permanently. If you plan to mount your Starlink dish to a roof, wall or ceiling, you will need to purchase the necessary mounting hardware.
3. Connect the Router
To get your dish running, you will need to connect the router. Your router will communicate with your dish as well as provide power for the dish.

The new router is Wi-Fi 6 compatible and comes with an external power adapter. Prior models included the adapter in the unit. It's fine to have the router on a desk or shelf. However, if you prefer it out of the way you could buy a Starlink mounting bracket.
4. Connect the Dish
Then, connect the dish with the router. It may seem counterintuitive, since you'll still have to mount the dish. However, you will need to connect your dish with your Starlink app and turn it on before you can position it properly.

You may be able to use an existing hole in your wall or an open window for an outdoor installation. In either case, make sure you have enough cable between your router, and the mounting point, as well as some extra for adjustments.
5. Mount the Dish
It's now time to mount your dish. The dish mount can be placed on the floor for basic installations.
The included kickstand may be enough for some roof mountings. However, most people will require something else: a roof mount with a ridgeline for rooftop peaks or sloped roofs; a pivot for sloped roofs; or even a mount on a wall.
You can mount the dish anywhere you want, as long as you have a clear view of the sky from 110 degrees and are close enough to the router so that you can use the included cable of 75 feet. (Or a longer cable of 150 feet if you ordered that).
The app will guide you through the installation and show you where to position the dish so that it has the best possible view of satellites overhead. The dish may need to be rotated one way or another, but as long it is pointing up, the majority of the work has already been done.
6. Run the Cable
You may be able to run your Starlink cable via an open window for an initial installation. You'll have to run the cable through a brick wall for a permanent installation. Starlink offers cables routing kits as well as kits for brick walls. The kit comes with the required drill bits, grommets and silicone sealant. However, you will need to supply the drill.

You will need to drill a pilot hole, widen the hole so that it can accommodate the bulk of the cable and then fish the cable through the wall. The hole is sealed with silicone caulk.
五、Activating Starlink
After you've positioned the dish and run the cable, the only thing left to do is activate the dish with the Starlink App. You can follow the Starlink app's setup guide, which is very simple.

It takes a few moments for the dish to establish a connection to the satellites above, so be patient. It's a quick (but not instantaneous) process. Once the dish establishes a connection, the Starlink app informs you that you are online and prompts you to set up your Wi-Fi name and password. Starlink then may take up to 20 minutes as it connects to the satellite network, downloads updates, and finishes its boot sequence before it's fully active and ready to use.